
The spring semester has begun. I can only take one in-person class a semester on account of having a 9-5 job so now it’s All Cake 1 All The Time up in here and that means I am going to learn how to squirt various tasty substances onto cakes in ways that look pretty.
Cake decorating also just happens to be my Achilles’ heel right now. I’m good at making shit that tastes good. I am not so good at making it pretty. I can shoot a pile of icing onto a cupcake and make it look …not entirely terrible, sure. I do know there is a fine line between a cute little swirl of chocolate buttercream and a poop emoji, yes. I’ve even taken a Wilton class before!
Singular.
The kids’ class.
When I was 8.
That was, uhhhhhhhhhhhhhhhhhhhhhhhhhhhhhhhhhhhhhhhhhhhhhhhhh… several years ago.
Anyway! Moving on! The point is, I can do an acceptable job of applying decorative cake spackle in a way that does not entirely look like hammered dog shit, but my skills are by no means professional tier and the next few months will be spent working on that. However, the few scant hours a week I spend in the classroom working on that might not be enough. Cake decorating is a skill that requires practice, and lots of it. But… well, there are an awful lot of moving parts involved, right? You need bags and tips and some sort of surface to practice on and obviously you need something to squirt onto that surface.
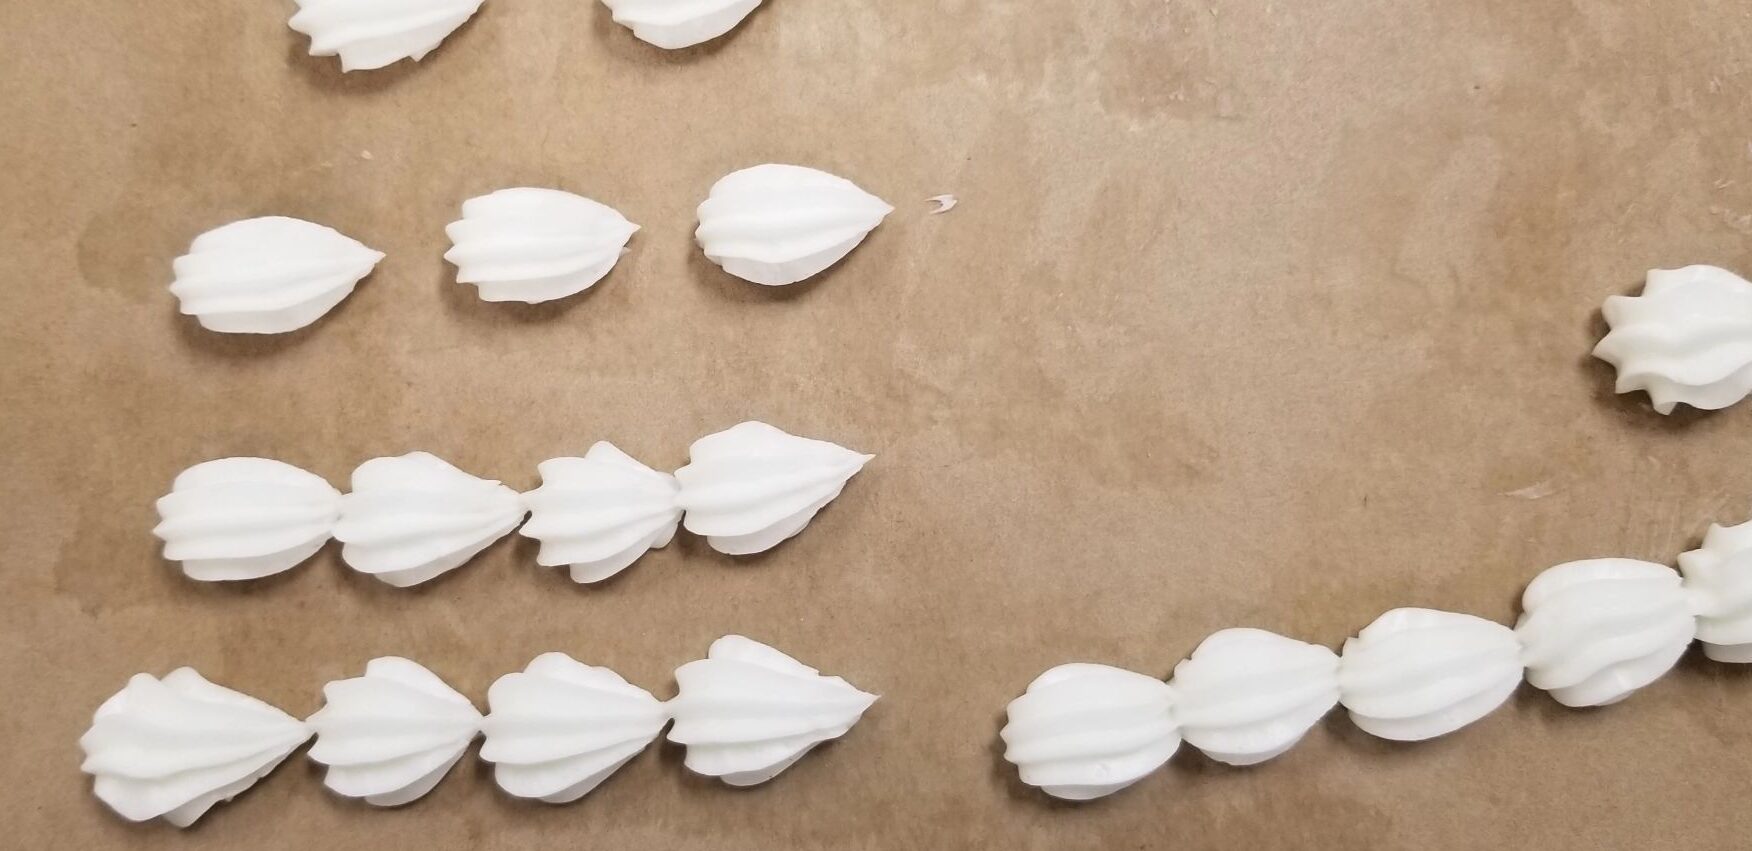
Now, decorative piping is a subject I have basically fuckall expertise in. Look at my shitty shells. Look at them. Are these the shells of a master? No. No, they are not. Honestly, I wish I’d taken pictures of the shells Chef squoze out onto my parchment because those were beautiful. Those were the shells of a master. These are the shells of a scrub who doesn’t know shit about shit.
(Chef did, at least, praise the consistency of my shitty practice icing and stole my bag a few times to demonstrate stuff for my classmates. So that’s cool.)
So “how2pipe” is going to be, at least for now, way outside the scope of this blog and definitely outside the scope of this post. But since I need a lot of practice, and I need stuff to practice with, I can at least share my preferences for practice-grade pipeable substances. Sure, you can just make actual American buttercream but do you really need to whip up a whole ass batch of real buttercream every time you want to practice? Heck no! There are a few options for cheaper, easier piping practice material and here are five of them.
Option 1: Whipped Cream
Pros: pretty quick to make, you just need a cup of heavy cream, a couple tablespoons of powdered sugar, and a little vanilla extract. You can even make it by hand, without a stand mixer or even a hand mixer, if you have a big bowl and a strong whisking arm. Tastes good on lots of stuff like cakes, ice cream, coffee, fruit, pudding, &c., &c.
Cons: It’s a good thing it tastes good, because you have to use it pretty much immediately and then either eat it or toss it. Softer consistency than buttercream, so you might not get a good feel for how much pressure you need to keep on your bag to get nice clean piping with buttercream. Kinda expensive.
Option 2: Mashed Potatoes (real or instant)

Pros: You can adjust the consistency with more water or more flakes to get something closer to whipped cream or a thick buttercream, as you like. Dirt cheap, if you use instant. If you use real mashed potatoes, you can make “duchess potatoes” which are classy as shit and will impress your dinner guests. Not nearly as greasy as many icings tend to be, much easier cleanup. Instant potatoes are probably the easiest option to mix, all you need is a bowl and a fork or whisk.
Cons: Boiling and mashing real potatoes is pretty labor-intensive compared to the other options. Not great for smaller tips, clumps and lumps may clog them. Kind of a similar texture to various icings but kind of not. Both real and instant taters need to be eaten or tossed before they go bad.
Option 3: Canned Frosting
Pros: Real icing! Not great icing, but real icing. Convenient. Cheap, if you get store brand or dollar store stuff. Tastes okay, generally. Consistency can be adjusted with milk or powdered sugar; easier with a hand or stand mixer but can be done by hand. Comes in a variety of flavors.
Cons: Once opened, must be refrigerated and used within a week or so. Will have to come up to room temp if it’s been refrigerated. Greasy, as many real icings are. Made for spreading rather than piping; adjusting the consistency to be suitable for piping could take as much time and work as just making a batch of icing from scratch. Once you get used to making your own icing, canned is going to taste like sad.
Option 4: Commercial Bulk Buttercream
Pros: This is real buttercream. Or, well, “real” in that it is meant to be eaten and thus some pains have been taken to make it taste good. It might be all butter. It might be margarine. It might be butter-flavored shortening. But it is meant to be eaten, so you can use your cupcakes and whatnot for practice surfaces. Requires no mixing, or just needs to be fluffed up before use.
Cons: Because it’s meant for foodservice use, it only comes in fuck-off huge tubs or even 5-gallon buckets. Do you have the fridge space for a 5-gallon bucket? I sure don’t! Cost per ounce might work out cheaper than a can of Betty Crocker from the grocery store, but you can’t just buy an 8-ounce can of it. Unless you have a Costco card or a GFS store or well-stocked bakery supply place nearby, you might have to order it online. Honestly, the bulk stuff is more trouble than it’s worth for about 99% of us; I just listed it as an option because it exists. But nah, unless you’re in some sort of classroom situation where a fuck-off huge tub would be just enough to go around, or else you just really really really want to use edible buttercream but can’t or don’t want to make it yourself AND ☝️ you have access to a walk-in, don’t bother with it.
Option 5: DIY Practice “Buttercream”
Pros: We made this in class and it’s great. It’s basically real American buttercream icing, except with vegetable shortening instead of butter. You can use the crappiest, cheapest no-name shortening you can find for this. You can adjust the recipe to give you the exact consistency you want, anywhere from soft to stiff. It may not be the cheapest option up front but the tradeoff is that it’s the only truly shelf stable option of the five. You can make it, practice with it, scrape it back into its tub, and store it at room temp and it’ll be fine. So really, it costs less in the long run because instead of making a fresh batch of instant taters or whipped cream every time you want to practice, you can just make one batch of this and reuse it for ages. It looks and feels like real American buttercream. It will pipe like real American buttercream. It will take color like real American buttercream. It will behave in almost every way like real American buttercream. Almost every way, except…
Cons: It tastes like shit.
Y’all, I tasted it so you wouldn’t have to and let me assure you, it tastes like shit.
You know that stuff they shoot Twinkies and Ding Dongs up with? That sugary, greasy mockery of whipped cream? It’s basically that, except thicker and sadder. And really, it’s the texture more than the taste that’s awful here. Shortening has a higher melting point than butter. So unlike butter, which has a delicious flavor of its own and will melt in your mouth and make your tongue happy, this shortening-based buttercream doppelganger just kind of coats the inside of your mouth in a layer of grease that is utterly devoid of flavor. And it persists. I could still feel a waxy coating on the roof of my mouth a whole room-temp Pepper Zero later. Ew.
So yeah, it’s technically edible but it’s gross and you really don’t want to put it on anything you’re going to eat. I guess the silver lining is that since it’s going to taste like shit anyway, you can make it with that can of Crisco in the back of your pantry that’s maybe been open a little too long and starting to smell a little funky? But that’s all the more reason to not eat it.
Also, it’s probably the second most labor intensive option behind real mashed potatoes. It really needs a sifter and either a stand or hand mixer for best results, and it cleans up like real American buttercream: lots of dish soap, hot hot water, and elbow grease.
So Which One is Best?
¯\_(ツ)_/¯
No, seriously though, it really does depend on what balance between ease of prep vs. shelf life vs. cost vs. etc. suits your particular needs. If you want an experience that verrrry closely mimics real American buttercream and you don’t mind the cost or labor upfront, go with the shitty practice “buttercream.” If you’re on a budget or just want to get right to piping without having to mix too much stuff, use cheap canned frosting. If you want something that tastes good without a whole lot of effort, use whipped cream. If you don’t want to have to scrub greasy stuff out of your tips, use instant mashed potatoes. Just find a practice icing or “icing” that works for you, lock in, and git gud.
PrintPractice “Buttercream”
This simulated cake spackling compound is fast, cheap, and easy. Like your mom.
- Prep Time: About 10 minutes
- Total Time: About 10 minutes
- Category: Frostings and Such
Ingredients
- 2 parts powdered sugar, sifted
- 1 part vegetable shortening
- Water (as needed)
- Flavor extract of your choice, preferably clear if you’re going to play with colorings (optional)
Instructions
- In a stand mixer fitted with the paddle attachment, beat shortening until creamy.
- Add powdered sugar and beat some more until smooth.
- Add water, 1-2 tbsp at a time, and beat until desired consistency is reached OR:
- Add 1 tbsp flavor extract of your choice and beat; add water 1-2 tbsp at a time if your extract is not enough liquid to get you to the desired consistency. Adding a flavor will not make the icing taste any better, but will at least make it smell a little more pleasant. PLEASE ONLY USE EDIBLE EXTRACTS FOR THIS. DO NOT USE ESSENTIAL OILS OR FRAGRANCE OILS OR VAPE JUICE OR ANYTHING LIKE THAT.
- Can be stored in an airtight container at room temp pretty much forever. Fill your bag, pipe onto a practice board or other non-food surface, scrape off, repeat all you want.
Notes
- I feel like I’ve said this a million times but I’m gonna say it again: don’t eat this. Especially if you’ve used less-than-fresh shortening. Don’t eat it. If you eat it anyway and 1-star it, I will roast you in the comments and I will encourage other readers to join in.
- What consistency should you aim for? Softer than you think. You want it just firm enough to hold its shape when you pipe it, but soft enough to flow easily through the tip without you having to squeeze the soul out of the bag and to taper off into a little soft peak when you stop squeezing and pull the tip away.
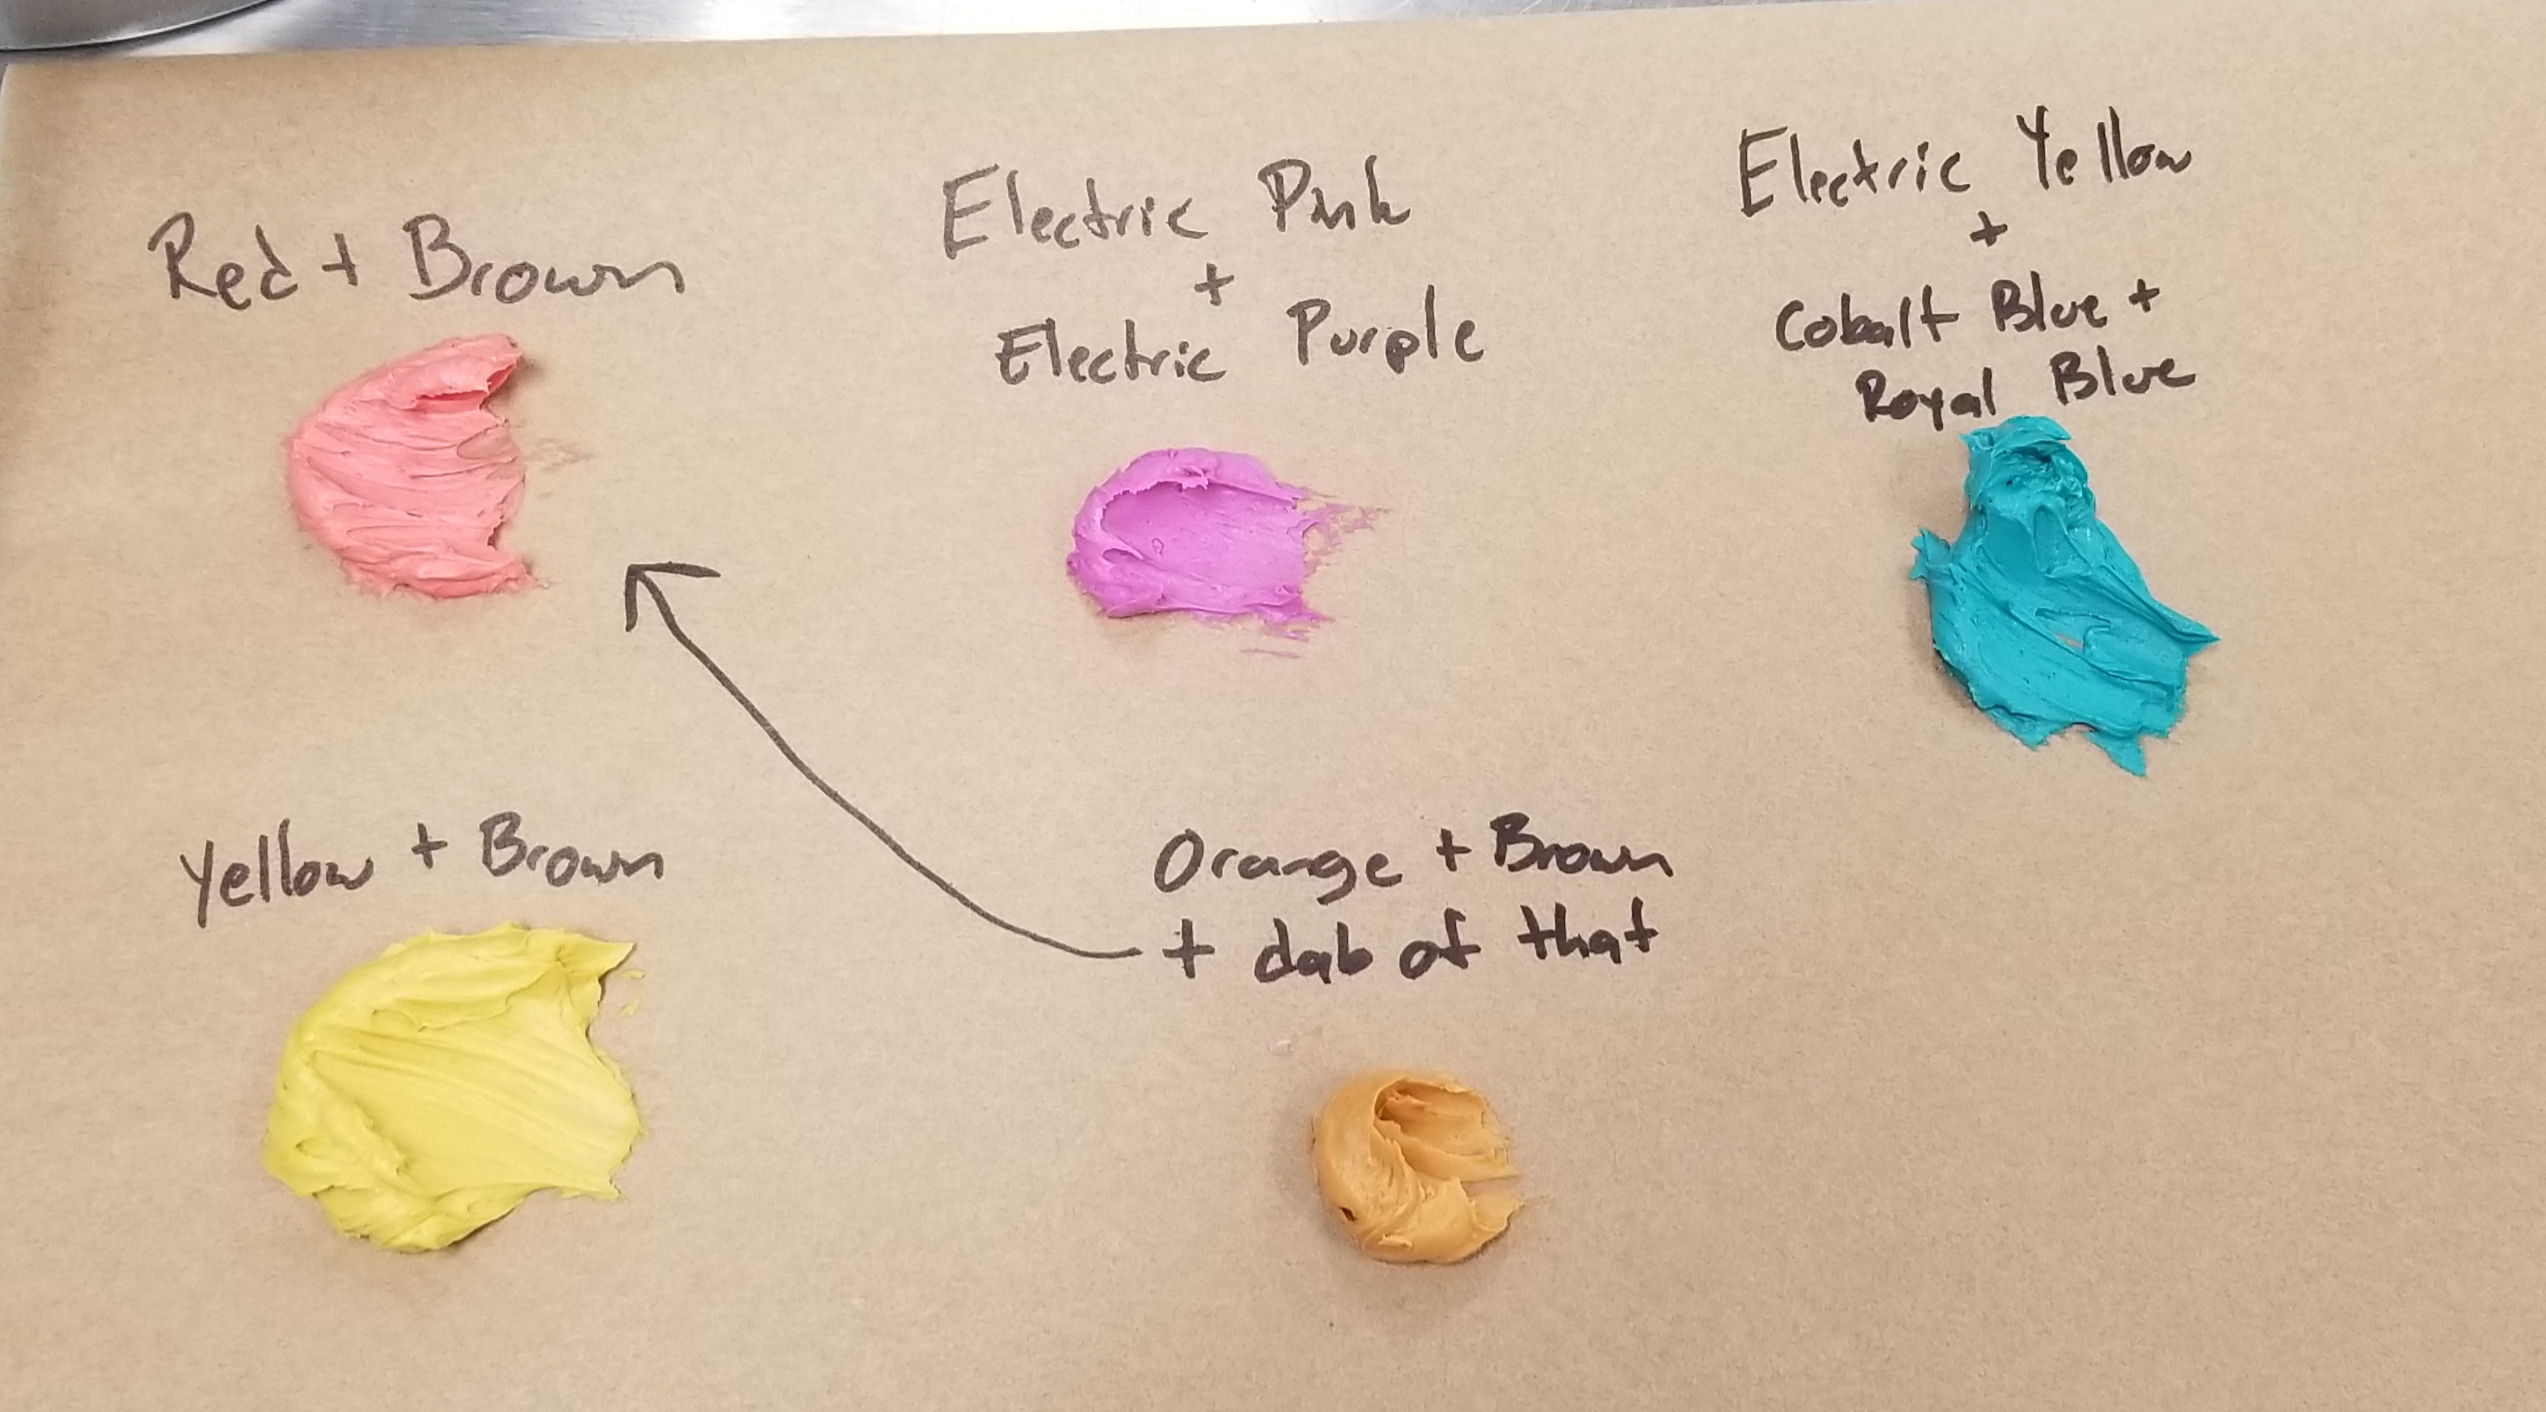
- This stuff can be colored with the same paste/gel/powder colors as real icing. Is that new “black” gel color you just got actually for real black? Now you can find out without turning your whole batch of good Italian buttercream purple or green or whatever.
- I kind of looked into using cornstarch instead of powdered sugar for this, mostly for cost reasons. But a few minutes of poking on HEB’s website (and bless HEB for showing the price-by-the-ounce right there on the product listing so I don’t have to do math) told me powdered sugar is actually like half the price of cornstarch–Hill Country Fare (the cheapest HEB store brand) powdered sugar works out to $0.06 an ounce, whereas the HCF cornstarch is $0.12 an ounce. So just get the cheapest store brand powdered sugar you can find. It’s fine.
- “Alex, you just said ‘this icing tastes like shit, don’t eat it’ about a million times up there, I already know expired Crisco and powdered sugar are going to taste like refried ass and I’m not even going to try it, so why shouldn’t I scent a batch of practice icing with sketchy ‘patchouli’ oil from a vape shop?” Because unless you’re bougie enough to buy a whole separate set of piping tips you will only ever use with practice icing and nothing else, you are going to be squirting practice icing that’s been scented with vape shop “patchouli” oil through the same piping tips you’re going to use for real icing someone is going to eat. Just pour some cheap imitation vanilla or some lemon extract or something in there. Please.
Leave a Reply